Showing posts with label orangutan. Show all posts

01 October 2008

Xbee Arduino Shield Kit

Yow. I've soldered a few things in my day but I kinda struggled putting together the NKC Electronics Freeduino Arduino Xbee Shield V2.0 Kit. Sure laugh it up, look at the very few parts in the picture. But this took me almost 3 hours of intensive labor, smelling caustic fumes, and burning fingers. I clearly over estimated my solder-foo.

The kit is great, well marked, pieces are minimal, the assembly instructions are clear, I just need practice soldering the many header pins. I'm so glad there wasn't any Surface Mount (SMT) because I couldn't have done it.

Now that it's built ... Now what? I need to interface this thing to the Pololu LV168 Orangutan Robot Controller. The shield is intended to work with an Arduino not an Orangutan. Both are based on the Atmel ATmega168 microcontroller but different form factor, different layout. Hmm ... Did I buy the wrong Xbee thing? Why was the shield thing the way to go? This click-to-buy option on web pages is starting to get me in trouble. I buy before I really know if it's the right solution. Hell, at least I got to practice my soldering skills.

The great thing about an Arduino shield is that it lines up with the sockets on the Arduino board and makes all the necessary electrical connection auto-magically.

The bad thing is that an Orangutan isn't the same form factor as an Arduino and that shield wasn't going to just line up and plug in. I need to connect the pins myself.

The best that I can tell, the Xbee really only needs 4 pins connected. Many other options but in the dirt simple mode, just these four:
  • +VCC
  • Ground
  • Din (Tx)
  • Dout (Rx)
The shield has a TLV2217 voltage regulator that takes the Orangutan's +5V and outputs a nice +3.3V for the Xbee. I knew that I wanted that shield for something. So, I need to power the shield with +5V but where? Where does the voltage get applied? Looking at the schematic, it was still not clear. The only place I see +5V is to the ICSP. Could that be it?

I posted a few forum questions at various boards and received the usual RTFM responses. Those are really helpful. I'm struggling, just have a question that I can't find the answer to anywhere, I really have read the flippin' manual and searched till I'm blue, and the experts don't help. Instead they write, "If you look at the pins on an arduino, you can see which pins get connected to what". Great, thanks much.

In the ICSP link above, the Tinker It Now dude says "connect the 5v only if you want your Arduino to power the target board". That was the first clue (thanks Tinker It Now) that I found about how a shield gets powered.

So I hook +5V to the shield's ICSP pin 2, GND to the shield's ICSP pin 6. Half way there.

What about Rx/Tx (Din/Dout)? What pins do they get hooked to? On an Arduino, digital pins 0/1 are Rx/Tx. Are they the same for an Orangutan? Pololu's excellent docs come to the rescue yet again. TTL-level communication are with pins PD0 (RX) and PD1 (TX).

But it can't be that easy, can it? After I hooked it up, I didn't seem to transmit. Something's wrong. Stupidity is what's wrong. Don't hook Rx to Rx and Tx to Tx. The Rx from Xbee goes to Tx on the Arduino/Orangutan. The Tx from Xbee goes to the Rx on the Arduino/Orangutan. That's better. Make the right connection and the damn thing works. Cool. What's next?

22 September 2008

Xbee Sounds Good

Although the Orangutan has an 8-character x 2-line liquid crystal display, I'm finding it tough to debug my AI and sonar troubles. I write messages to the screen but without history, I miss the important stuff and end up having to repeat the test over and over and over. I'm looking at using the serial port for writing debug messages.

I tried Atmel's AVR Studio that's an Integrated Development Environment (IDE) for writing and debugging AVR® applications in Windows® 9x/NT/2000/XP environments. But since I use Linux, not Windows I've had a few difficulties getting it going using Wine. I need to spend some time getting this going cause I'd much rather use an IDE than an editor, Make files, and print statements. On my to-do list.

In the mean time ... Why spend time fixing a problem when another interesting gadget is waiting to be played with?

When I was mucking with the Gumstix controller, the idea of using Bluetooth and/or Wi-Fi to remotely communicate was pretty cool. Alas, the Orangutan doesn't have cheap wireless options. Or does it?

Digi's Xbee RF Modules sound really interesting. Low-cost, low-power mesh networking for about ~$25 each. Sparkfun has a good selection of the various Xbee flavours. The 2mW Series 2.5 Wire Antenna version has a 400' range and is the one that I have my eye on.


Here's today's plan:
The Xbee shield is cheap, about $14, and will allow me to interface the +3.3V Xbee to the +5V Orangutan. The Explorer will run with my PC. As the Hummer-bot moves around, I'll have the Orangutan send status messages so I can understand why it turned and slammed into the wall. I'll use the PC bee to view the status and then be able to remotely send control commands to Hummer-bot.

15 September 2008

Orangutan - Sonar Struggles

I admit. My AI skills are lacking in both skill and quality. My attempt to make a ex-RC car into the super Hummer-bot has been less than successful (so far). After frickin' amazing success on the first fews days of using the shiny new LV168 Orangutan Robot Controller, I've come back to Earth and have been struggling.

My bot is a cyclops with a single sonar range finder mounted on front. I'm doing a very simple algorithm that drives straight until it detects an object closer than 24". It slows and does a random 15 degree turn to either right or left. If the object is still closer than 24", it continues to turn in the same direction. If the coast is clear, the wheels straighten and speed increases. Pretty simple. In mostly open areas, it works well. In my hallway, it's a deathtrap. Hummer-bot gets caught on the first or second corner and the car absolutely flips out, spinning wheels and turning back and forth until I rescue it.

For the first few days, the Sonar Range Finder appeared to work spot on. Now it needs a dog and a cane 'cause the damn thing can't see anything. Could be due to Hummer-bot smashing into the wall repeatedly during a spastic frenzy of very un-AI behaviour. My sonar acts either completely dead or randomly sends wild readings.

This is a code snip of the Analog-to-Digital Conversion (ADC) code for reading the sonar. I tried for an hour to setup the Google Syntax Highlighter so that the code would look pretty but I failed. Instead you get a screenshot.

As you see, the sonar reading code is simple. Most of it (all?) is stolen re-used from LV168 resources that are available on Pololu's great project pages.

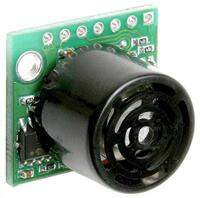
The Maxbotix LV-MaxSonar- EZ1 Sonar Range Finder detects objects from 0 – 254 inches (6.45 meters) with 1-inch resolution for distances greater than 6 inches. My finder suddenly seems to only see objects in a 6-12 inch range and very sporadically.

I've tried different analog pins with the same results so I'm suspecting I have a damaged device. They're fairly cheap at $25 but I hate to buy the same thing. I may need a new shiny.

23 August 2008

Pololu Orangutan - New Shiny

A while back, I bought a Gumstix with the hope that I'd interface it to an RC car. I wanted to see if I could make a pseudo-autonomous car that would zoom around the yard and I'd monitor/control it via Bluetooth or Wi-Fi. After spending a few hundred dollars on various pieces, parts, and expansion boards, I had a pretty cool setup. The Gumstix motherboard runs Linux, has great community support. But it was overkill for my hobby needs. I got frustrated with attempting to interface it with a simple PWM motor controller. No progress == boredom, so Mr Gumstix was soon put on a shelf.

On a recent break from work, I pulled out the Gumstix and wanted to try again. My motor controller kit came from Pololu so I went back to their website to try and remember where I was. And there I saw the next shiny thing that I must own. A shiny new LV-168 Orangutan Robot Controller.


So ... Out came more dollars and the Gumstix has gone back to the shelf. The description of the Orangutan is great, seems to have what I need:
(from Pololu's website)
The Orangutan robot controller is a complete control solution for small robots. It includes an 8-character x 2-line liquid crystal display, two bi-directional motor ports, a buzzer, three pushbuttons, and up to 12 user I/O lines, yet the compact module measures only 2.00" x 1.85" and weighs less than 1 ounce. Because of the complete feature set, very few additional components (such as sensors or motors) need to be added to complete the electronic portion of a small robot. The small package allows for greater flexibility in incorporating the electronics into the mechanical design of a robot.

The Orangutan is based on Atmel’s ATmega168 microcontroller, which features 16 Kbytes of flash program memory, 1024 bytes of SRAM, and 512 bytes of EEPROM. Up to 8 channels of 10-bit analog-to-digital conversion are also available. Because the user has direct access to the microcontroller, any development software for Atmel’s AVR microcontrollers, including Atmel’s free AVR Studio and the WinAVR GCC C/C++ compiler, is compatible with the Orangutan. An in-circuit programmer, such as our Orangutan USB programmer, is required for programming the Orangutan.

The Orangutan input voltage is 5-10 V, making it well-suited for use with small DC motors and 5- to 8-cell NiCd or NiMH battery packs. The motor driver can supply up to a maximum of 1 A per motor channel, subject to power dissipation requirements. Total power consumption (with motors and buzzer off) is under 15 mA.
Sounds great, what can I lose by trying it out? Um, $50.

I ordered on Friday night after midnight. I couldn't just order the controller, I needed the USB programmer also. The combo meal deal is what I needed. After shipping, it was $84.90.

I live in a small town, mail is sometimes slow so I was amazed when my package arrived Tuesday, 2 business days after ordering. Very nice.

Unpacked around 7pm and by 10pm, I had both RC motors hooked up and under programmatic control. By 11pm, I had a Pololu Sonar Range Finder (left over from the Gumstix days) working. Not a bad night's work. Much more to do but for now, the car drives down the hall until it sees a wall and then randomly turn right or left. It soon gets hung up on a corner, spins its wheels, and wildly turns the front wheels like a spastic creature. This is fun stuff.

The code is written in C with Orangutan-lib and AVRDUDE to program the Atmel ATmega168 microcontroller. Really, no learning curve, this has been dirt simple. The resource page on Pololu's LV-168 page has been great as well as their support forums.